I got a full time job *YAY* but it's back in the Metroplex *UGH*. Our current situation is that Joshua and I spend 4 days per week at my sister's house (THANK YOU!) since she lives about half way between my house and my work. She watches Joshua for me during the day. Jacob and DH stay at our house and Jacob goes to school and DH goes to seminary an hour and a half in the other direction from the Metroplex (you don't want to know how much we spend on gas each month).
Back to the DIY:
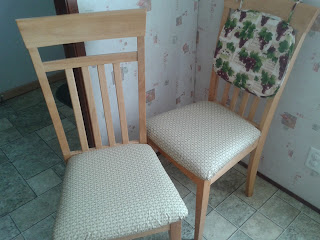
We got this dining set five or six years ago...maybe more. The point is that Jacob went through his toddler years sitting in these seats while he ate so all our chairs looked like this:
Being the cheapskate that I am, I decided to just re-cover the chairs. I went to Walmart and looked through the fabric section, where I came across something I thought would be awesome for chairs likely to be used by kids...cloth-backed vinyl. There was little sample strip on the outside so you could feel the thickness and texture. Feeling it, I realized that it was eerily similar to the tablecloth I just bought for $5. So I went back over to the section with the tablecloths and grabbed the largest size in a style I thought would go nicely with the other tablecloth I had purchased.
DIY Re-covering Dining Chairs
WHAT YOU NEED:
Chair
Cloth-backed tablecloth
Screwdriver or allen wrench, depending on your chair
Stapler
Staples
INSTRUCTIONS:
Step 1:
Flip the chair over and remove the chair pad from the chair frame. This is a good time to clean out any messes that got in the crack between the pad and the frame.
 |
| Make sure you only remove the screws attaching the pad to the frame. We're not dismantling the whole chair ;) |
Step 2:
Spread out your tablecloth (or whatever fabric you choose), place the pad on the fabric for measurement and cut with enough space that you have enough fabric to cover about 3 inches on the back.
Spread out your tablecloth (or whatever fabric you choose), place the pad on the fabric for measurement and cut with enough space that you have enough fabric to cover about 3 inches on the back.
 |
| If your fabric has a pattern that you want facing a certain direction, make your measurements and cuts with the right sides up. |
Step 3:
With your pad in the middle of the fabric, both face down, bring the fabric up around the bottom of the pad and staple it as close to the edge of the fabric as possible. Repeat on all four sides.
 |
| Jacob's a super helper. Hey, he's the one that ruined them, right? |
Step 4:
Bring the corners up and staple.
 |
| If you're careful, you can even avoid creases. We weren't careful enough... |
 |
| Much better! |
Reattach the pad to the chair frame.
Step 6:
Admire your 'new' chairs!
 |
| You can use seat pads that match as back pads for extra comfort. |


